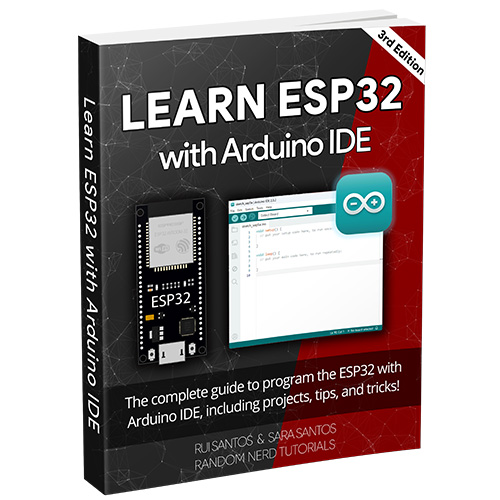
Description
The “Learn ESP32 with Arduino IDE” eBook contains 10 Modules to take the most out of the ESP32. We’ll start by introducing the ESP32 main features and explore its GPIOs. We’ll also cover a variety of subjects related to IoT like Web Servers, Bluetooth Low Energy (BLE), MQTT, and LoRa. Each subject contains practical examples with schematics and code. It also includes 4 advanced projects.
Table of Contents
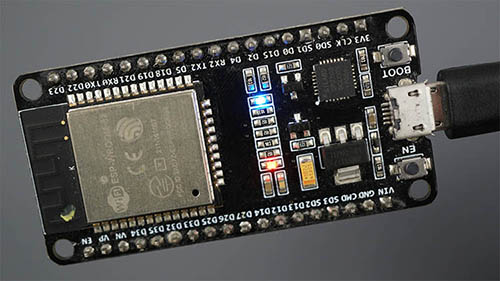
This first Module is an introduction to the ESP32 board. We'll explore its features and show you how to use your board with this eBook. You'll also prepare your Arduino IDE to upload code to the ESP32. You must follow this Module first before proceeding to any other project/example in the eBook.
- Unit 1: Introducing ESP32
- Unit 2: Installing ESP32 in Arduino IDE
- Unit 3: How To Use Your ESP32 Board with this eBook
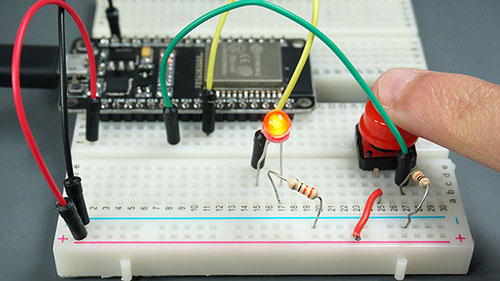
In this second Module, we'll explore the ESP32 GPIO functions. We'll show you how to control digital outputs, output PWM signals, and read digital and analog inputs. We'll also take a look at the ESP32 touch-capacitive pins and the ESP32 dual-core feature.
- Unit 1: Pinout Reference: ESP32 GPIOs Explained
- Unit 2: ESP32-S3 Pinout
- Unit 3: ESP32 Digital Inputs and Outputs
- Unit 4: Capacitive Touch Pins
- Unit 5: ESP32 Pulse-Width Modulation (PWM)
- Unit 6: Reading Analog Inputs
- Unit 7: ESP32 with PIR Motion Sensor: Interrupts and Timers
- Unit 8: ESP32 Dual Core: Create Tasks
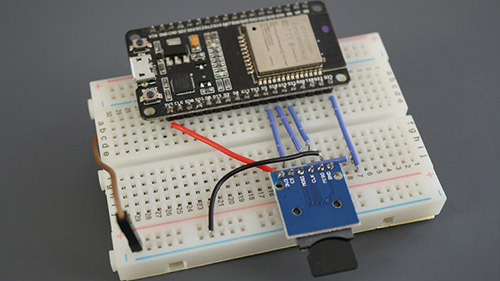
Learn how to handle files on the ESP32 and how to save data permanently. We’ll cover saving data on Preferences (NVS memory), on the ESP32 filesystem (LittleFS), and on a microSD card.
- Unit 1: Save Data Permanently using the Preferences Library
- Unit 2: ESP32 LittleFS Filesystem
- Unit 3: LittleFS: Save Variables Values in a File
- Unit 4: Saving Data to a microSD Card
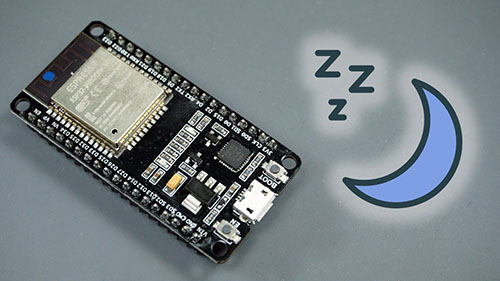
Using deep sleep with your ESP32 is a great way to save power in battery-powered applications. This module will show you how to put your ESP32 into deep sleep mode and the different ways to wake it up.
- Unit 1: ESP32 Deep Sleep Mode
- Unit 2: Deep Sleep - Timer Wake Up
- Unit 3: Deep Sleep with Touch Wake Up
- Unit 4: Deep Sleep External Wake Up

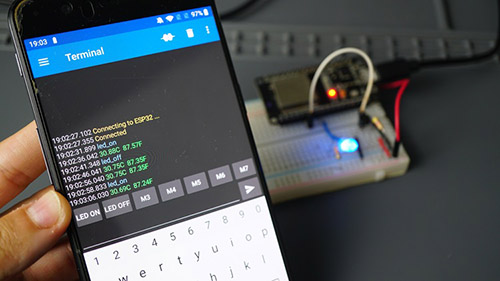
Get started with Wi-Fi on the ESP32. We’ll cover basic concepts about Wi-Fi networks, you’ll learn how to set the ESP32 as an access point and as a wi-fi station and how to make HTTP requests. We’ll also cover how to set an ESP32 board as a Wi-Fi client and another one as a Wi-Fi server to exchange data between them.
- Unit 1: Introducing Wi-Fi
- Unit 2: Getting Started with HTTP Requests
- Unit 3: Making HTTP Requests (WorldTime API and ThingSpeak)
- Unit 4: ESP32 Client-Server Wi-Fi Communication Between Two Boards
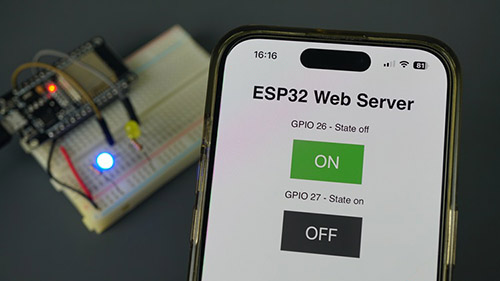
This Module explains how to build several web servers with the ESP32. After explaining some theoretical concepts, you'll learn how to make a web server to display sensor readings, control outputs, and much more. You'll also learn how you can edit your web server interface using HTML and CSS.
- Unit 1: Web Server Introduction
- Unit 2: ESP32 Web Server: Control Outputs
- Unit 3: ESP32 Web Server: HTML and CSS Basics
- Unit 4: ESP32 Web Server: Authentication
- Unit 5: Accessing the ESP32 Web Server from Anywhere
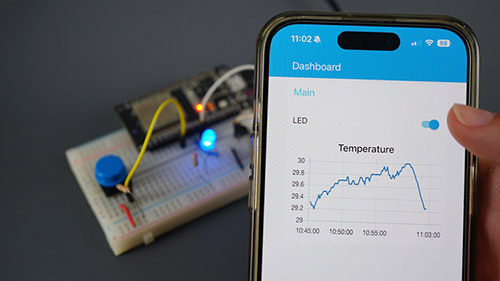
- Unit 6: ESP32 Web Server - Display Sensor Readings
- Unit 7: Asynchronous Web Server: Temperature and Humidity Readings
- Unit 8: Asynchronous Web Server: Control Outputs
- Unit 9: Build an ESP32 Web Server using Files from Filesystem (LittleFS)
The ESP32 comes not only with Wi-Fi but also Bluetooth and Bluetooth Low Energy built-in. Learn how to use the ESP32 Bluetooth functionalities to scan nearby devices and exchange information (BLE client and server).
- Unit 1: ESP32 Bluetooth Low Energy (BLE): Introduction
- Unit 2: Bluetooth Low Energy: BLE Server, Scanner, and Notify
- Unit 3: ESP32 BLE Server and Client - Part 1/2
- Unit 4: ESP32 BLE Server and Client - Part 2/2
- Unit 5: Bluetooth Classic
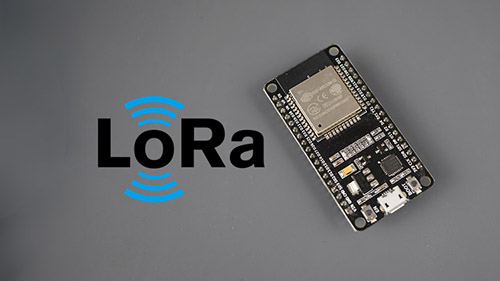
LoRa is a long-range wireless technology. In this Module, you'll explore LoRa and how you can use it with the ESP32 to extend the communication range between IoT devices.
- Unit 1: ESP32 with LoRa: Introduction
- Unit 2: ESP32 LoRa Sender and Receiver
- Unit 3: Further Reading about LoRa Gateways
- Unit 4: LoRa: Where to Go Next?
MQTT stands for Message Queuing Telemetry Transport. It is a lightweight publish and subscribe system perfect for Internet of Things applications. In this Module, you'll learn how to use MQTT to establish a communication between two ESP32 boards and how you can control the ESP32 using Node-RED (an IoT platform).
- Unit 1: Introducing MQTT
- Unit 2: Installing Mosquitto MQTT Broker on a Raspberry Pi
- Unit 3: MQTT Project: MQTT Client ESP32 #1
- Unit 4: MQTT Project : MQTT Client ESP32 #2
- Unit 5: Installing Node-RED and Node-RED Dashboard on a RPi
- Unit 6: Connect the ESP32 to Node-RED using MQTT
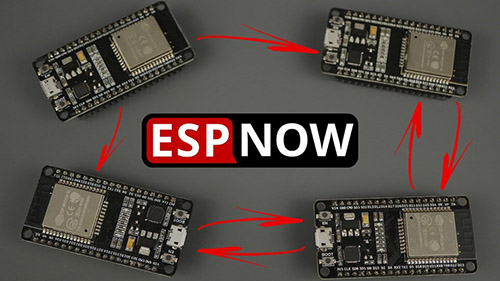
ESP-NOW is a connectionless communication protocol developed by Espressif that features short packet transmission. This protocol enables multiple devices to talk to each other easily.
- Unit 1: ESP-NOW: Getting Started
- Unit 2: ESP-NOW Two-Way Communication Between ESP32
- Unit 3: ESP-NOW Send Data to Multiple Boards (one-to-many)
- Unit 4: ESP-NOW Receive Data from Multiple Boards (many-to-one)
- Unit 5: ESP-NOW Web Server Sensor Dashboard (ESP-NOW Wi-Fi)
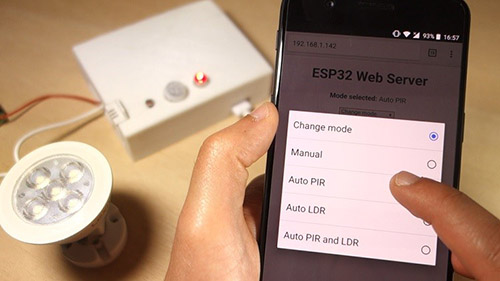
In this project you'll build an ESP32 Wi-Fi Multisensor. This device consists of a PIR motion sensor, a light dependent resistor (LDR), a DHT22 temperature and humidity sensor, a relay, and a status RGB LED. You'll also build a web server that allows you to control the ESP32 multisensor using different modes. Units in this project:
- Unit 1: ESP32 Wi-Fi Multisensor - Temperature, Humidity, Motion, Luminosity, and Relay Control
- Unit 2: ESP32 Wi-Fi Multisensor - How the Code Works?
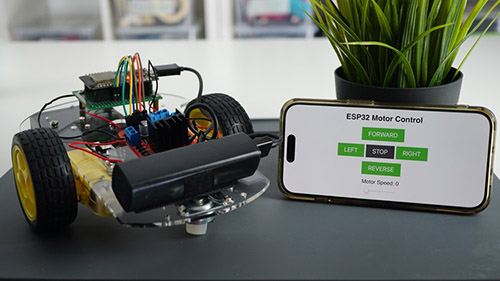
In this project we’ll show you step by step how to create an ESP32 Wi-Fi remote controlled car robot. Units in this project:
- Unit 1: Remote Controlled Wi-Fi Car Robot - Part 1/2
- Unit 2: Remote Controlled Wi-Fi Car Robot - Part 2/2
- Unit 3: Assembling the Smart Robot Car Chassis Kit
- Unit 4: Extra - Access Point (AP) For Wi-Fi Car Robot

In this project you’re going to create an Android application to interact with the ESP32 using Bluetooth Low Energy (BLE).Units in this project:
- Unit 1: ESP32 BLE Android Application – Control Outputs and Display Sensor Readings
- Unit 2: Bluetooth Low Energy (BLE) Android Application with MIT App Inventor 2 – How the App Works?
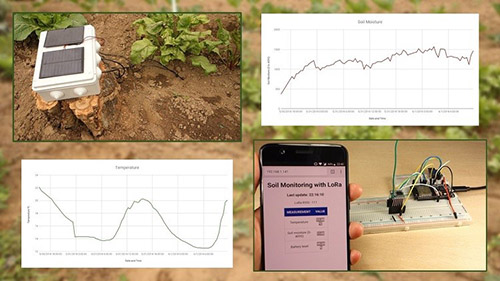
In this project you’re going to build an off-the-grid monitoring system that sends soil moisture and temperature readings to and indoor receiver. To establish a communication between the sender and the receiver we'll be using LoRa communication protocol. Units in this project:
- Unit 1: LoRa Long Range Sensor Monitoring and Data Logging
- Unit 2: ESP32 LoRa Sender
- Unit 3: ESP32 LoRa Receiver
- Unit 4: ESP32 LoRa Sender Solar Powered
- Unit 5: Final Tests, Demonstration, and Data Analysis
About the Authors

Hey there, I’m Rui Santos, founder of the Random Nerd Tutorials blog. We’ve been working hard over the years to keep this eBook dedicated exclusively to the popular ESP32 chip always updated. This eBook is our complete guide to take the most out of the ESP32. If you like my work, you'll certainly like "Learn ESP32 with Arduino IDE" eBook.

Hi! I’m Sara Santos! I work at the RNT blog and I've been working with Rui in the "Learn ESP32 with Arduino IDE" eBook. The ESP32 is a powerful chip and allows you to build complex IoT projects if you know how to use its capabilities. By the end of this eBook you'll be able to make your own ESP32 projects. I'm sure you'll like it.